More Bryce Creations
I wanted to explore more Bryce features, so I decided to create various scenes to demonstrate the other possibilities of this program.
My main purposes were:
1) Create a scene using a large amount of objects.
2) Create a good looking city as quickly as possible.
3) Import a 3D model and play with rendering options to get the best possible result.
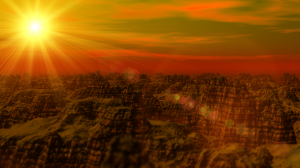
First, I created the desert-looking Mars scene where I used 3 terrain elements just randomly positioned and rotated so they didn’t look the same. I grouped some together and made about 100 copies of every group. I gotta say that it was really hard for the computer. There wasn’t any problem with final render but in the wireframe mode where you edit and position your objects and camera, all the models changed to the lower wireframe resolution, so the shapes of each element were…should I say – uniform. This thing surprised me a little bit, because I’m not running on some low system but on Intel Core i7 and I’ve got GPU and OpenGL supported graphics card by nVidia. Nevertheless the final result was looking good. I also used some advanced rendering features which I wanna talk about a little bit later. And by the way the lens flare I added is from Knoll Light Factory (I believe the preset is called “Desert Sun”).
Mars Desert
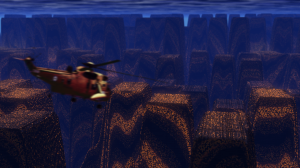
Next, I wanted to create a city. In Bryce there is a really cool option how to do it. First go to Google Images (or anywhere else), search for “random bircks” and choose “black and white”. I found this image which became pretty useful. It’s actually very simple. You wanna find an image with black and white bricks and couple of bricks with various shades of grey. What does it mean?! It’s a ground plan of your city. The bricks symbolize the buildings. The whiter those bricks are, the higher those buildings will be. Download the image (if you cannot find anything useful, just go to Paint or Photoshop and make your own texture 😉 ), then simply create a terrain element in Bryce and go to terrain editor. Click on the “Picture” button and load your ground plane. The terrain will update automatticly. Truth is, the image I found is a little bit stretched, but it can be corrected inside of Bryce by shrinking the object. It’s also a little bumpy but for the demonstration it doesn’t matter. Then I just chose one of the built-in city textures and finaly added a glow to the windows and composed a helicopter inside of After Effects. If you want to know more about buliding a city in 5 minutes inside of Bryce watch this.
Futuristic City
Finally I downloaded a 3D model of the yacht from turbosquid.com and tried to compose it inside of Bryce. Unfortunately something happened to the textures so I had to add different textures in Bryce. I made few copies of the boat with various colors, played with the sky and fog etc. Then I went into rendering options. When you set the quality to premium it allows you to activate soft shadows, blurry reflections (which I didn’t use) or the depth of field (DOF), which is, in my opinion, one of the coolest features of Bryce and it really helps your scene to be more realistic. I added soft shadows and the DOF to the previous scenes as well and I guess it literally makes a big difference (especially the DOF). However the boats were making some weird sharp reflections on the water so I painted those reflection out in After Effects and added a subtle lens flare from Optical Flares.
Boats
The strongpoint of this program is simplicity. I gotta say this program has exceeded my expectations and in combination with DAZ Studio/3DS Max/Cinema 4D/Blender and After Effects it can be a really useful tool for your filmmaking. 🙂


